
Blog
Corgi Jaguar XJ12C Model Conversion: Part 4 – Rear Detailing
Sep
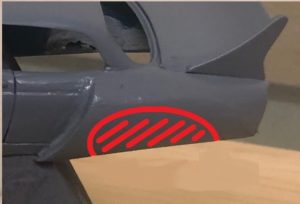
The continuing story of the Corgi Jaguar XJ12C conversion is concentrating on the very distinctive rear wings. The miliput filler has set really hard which now allows some reworking and cutting open the wheel arch shape.
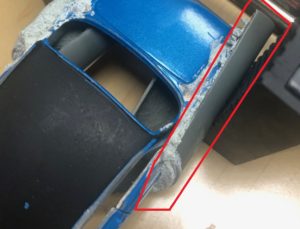
The picture shows half of the grey plastic tubing secured with miliput to the rear wing. On this side you can see the overhang which will be cut off using a Dremel type cutter. The miliput has dried with a rough surface which was not ideal, but I did not have the superfine version in the workshop at the time.
At this stage in the build there will be a lot of sanding and cutting as the base model was a toy car and my intention is to make it into a collectors model car!
Shaping the Wheel Arch of the Corgi Jaguar XJ12C: Cutting and Sanding Techniques
The picture shows the Corgi Jaguar XJ12C model with a base primer and the area I will be removing to make the wheel arch.
A grey primer at this early stage helps show up imperfections in my work and makes it easier to see what further filling I need to do before a final grey primer is added. You can also see the boot has its very large rear wing added. I will look at this in more detail later but essentially it is simply sheet plasticard superglued in place. Plasticard is great for all modelling needs as it is easy to work with, takes many types of glues and can be in black, white or even clear thicknesses.
Essential Tools for Model Conversion
As a general modeller, I try and keep a good selection of needle files, nail file boards and various grades of grit papers.
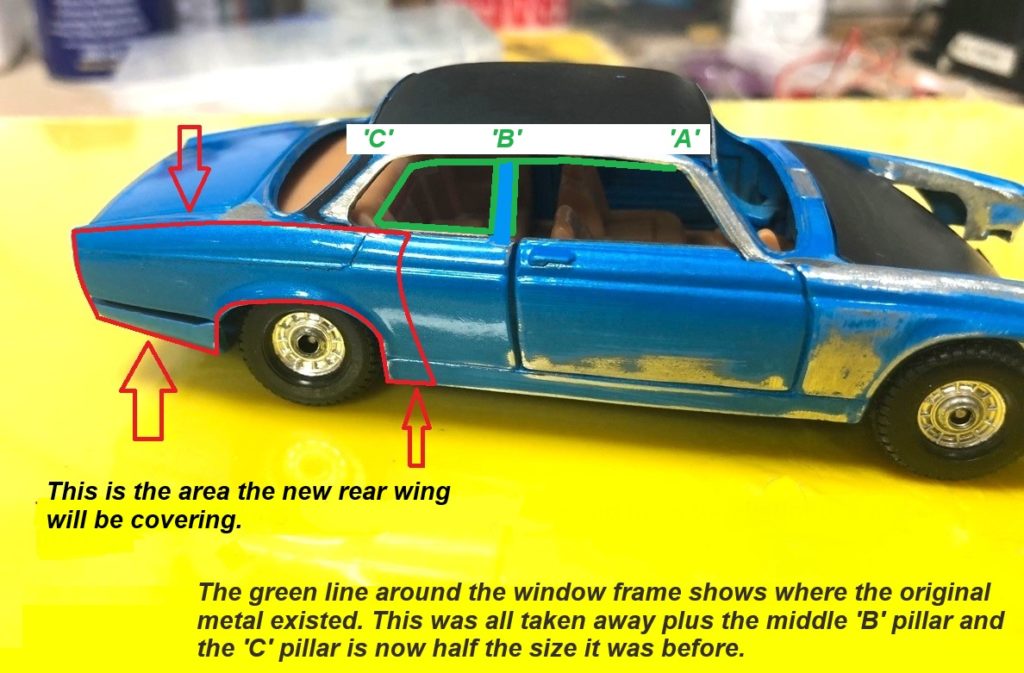
The next picture describes the area where the new rear wing will be placed and…the treatment of the ‘A’, ‘B’ and ‘C’ pillars. The ‘A’ pillar required very little attention apart from some cleaning up of the rough casting edges. The centre ‘B’ pillar was removed completely as it is in the wrong place for the particular real car the Corgi Jaguar XJ12C model is trying to represent and the new pillar will be made of a thin strip of plasticard. The most work was with the rearmost ‘C’ pillar which needed to be made significantly narrower.
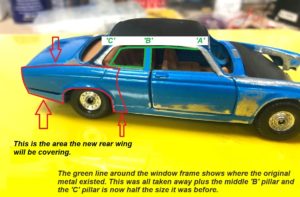
The reason for all these changes is because (as far as I know!) while the overall body looks like a Jaguar, the body panels are probably a type of fibreglass compound for lightness as these track cars are very serious contenders and fast race cars so lightness is paramount!
Superglue Tips and Best Practices for Model Cars
I have mentioned superglue before and it is something I use a lot of within my model projects and this model is no exception. The only problem is you should not use it for securing any glazing components such as windows and/or headlamp lenses, it will cause a fogging so you can not see through windows, so choose an evo-stik or UHU type glue.
Next time I will look at the rear of the Corgi Jaguar XJ12C model car which is now quite wide so new rear lights will be made and an unexpected surprising detail crops up!